Friday, September 23, 2011

inspiration mood Board: Masculine Contemporary Indigo

One of my friends is designing a condo for a young professional  who wants a contemporary masculine condo and loves the color navy.
In brainstorming ideas, I came up with this concept living room for inspiration.


 Masculine and streamlined, yet comfortable enough to kick back and watch some TV or play video games. I think of someone who's seen a bit of the world and collected interesting pieces when I think of this young professional, so I threw in a rustic element or two for contrast.

The whole scheme features a navy and chartreuse scheme, with dark wood accents. This client has an urban condo with light wood floors, exposed concrete, and floor to ceiling windows.  Dark navy walls ground the space and give a moody vibe, while a concrete coffee table stands up to all the abuse pizza and video games can dish out. Chrome-arm chairs with a navy leather upholstery are slick and masculine, while the charcoal sofa is sure to feature comfy arms for napping during watching the game. Soft linen panels add an element of privacy to the windows, while the area rug dampens sound and ties the space together.


Tuesday, September 20, 2011

Why Prince Charming is Prince Charming

We were over at Prince Charming's Dad's house, when I got grilled asked why I like him so much. One of the things I responded with was that he was always helpful and encouraging of me, especially when it comes to this blogging adventure.

 Like cutting sticks into pieces for me to make my wood round wreath.

 But also because he does things like install my new kitchen fixture while I'm away on a work trip.

 And then to install under cabinet lighting in the kitchen since I've always complained the counter by the stove is too dark.


So while I can cross things off my projects list, I can't always share them because I keep coming home to find them done, with only the tools as evidence. So if you ask me again why Prince Charming got that name, it's because MY Prince has tools and knows how to use them! Which is pretty terrific for this DIY kinda girl.

Monday, September 19, 2011

Learning to Cook Dinner

I don't remember learning to cook. I guess it's been something I've learned by helping over the years. I can remember being in middle school cooking things, and having some spectacular failures. Knowing how to cook is something I admit I often take for granted. I don't have to think about how to put dinner on the table every night. This weekend, I was reminded that so many people struggle with that daily dilemma. For lots of families this is a truth:

source
One of Prince Charming's friends is moving 10 minutes away from my house this week. In talking with this friend's wife, K, she asks me if I can teach her to cook. Of course- I love creating new foodies. :)

In thinking about how to teach her to cook, I thought I'd share some tips with you. Just in case you have trouble in the dinner department too.

1. Start small, and don't over-do it. I only cook one new recipe a week. Like any new thing, trying to do a whole lot at once is overwhelming. Even if you can't boil water, just pick one day a week to try a recipe. I like the weekend, since I tend to be more relaxed and not so stressed about getting dinner on the table at a reasonable hour. After a while, you'll be able to add more nights in where you cook things you already know how to make.

2. Start by making a list of things you like to eat. For so many people, the hardest thing about dinner (other than the fact it comes EVERY DAY), is figuring out what to make. The first step to meal planning is thinking of what you like. I made a list of things I liked to eat when I was in my first apartment. Those are the things you want to learn to cook first. Once you know them, you can have Taco Tuesdays or Spaghetti Fridays or whatever.

3. Don't be intimidated by fancy names of dishes. You might think you could never make boeuf bourguignon, when really, it's beef stew in a fancy dress. Chicken Parmesan? That's breaded chicken with spaghetti sauce and cheese. Risotto? Slow cooked rice.

4. Don't be afraid of meal helpers. Lots of people cook dinner every night with Hamburger Helper, make cakes with Duncan Heinz, and are perfectly good cooks. The reason those products are on the shelf is that it makes dinner cheaper/ easier/ faster. So use them if you want or need to.

5. Expect failure. Even Julia Child had flops. We all do. I still remember the dried out Thanksgiving turkey that was raw inside. The key is to say "oh well" and just eat all the side dishes.


Hopefully, this advice helps you in your dinner escapades. Please let me know if you'd like to hear about how K  learns to cook.

Tuesday, September 13, 2011

Tasty Tuesday: Vintage Betty Crocker Meat loaf

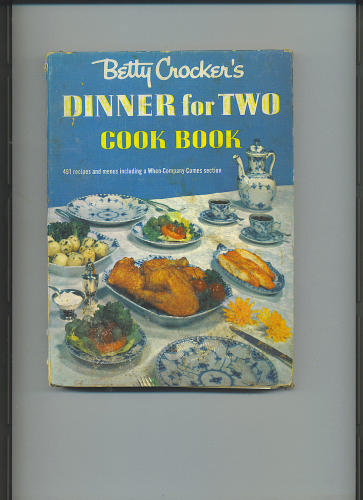
Sometimes, you just can't mess with a classic. I have Mom's Betty Crocker Dinner for Two cookbook from the seventies. While some things aren't quite to my taste (Jellied Chicken, anyone?), it's a great resource for me, especially for menus for two. Sadly, it's not available new anymore, but you can find used copies on Ebay and Amazon.
Amazon.Com


One of my go-to recipes is her meatloaf recipe.


Take a look at the photography!

Here's a closer look at the recipe:

Meat Loaf:
1/2 lb ground beef
1/2 lb ground lean pork ( I  use turkey instead)
1 1/2 slices soft bread, torn in pieces, and 1/2 cup milk, or 1/2 cup dry bread crumbs and 2/3 c milk
1 egg, beaten
2 tbsp minced onion
salt to taste
1/8 tsp each pepper, dry mustard, celery salt, and garlic salt
1 1/2 tsp Worcestershire sauce
ketchup

Heat the oven to 350 degrees. Mix everything in a large bowl until thoroughly mixed. Shape into 2 loaves and place in a baking pan. I use my 9x13 pan, sprayed with cooking spray. Squirt ketchup over the top of the loaves. Bake about an hour, or until done.  Makes 4 servings.


I think there is a rule that says meat loaf must be served with potatoes.  This time, mine were baked, and I served this with some roasted summer squash and zucchini.

Monday, September 12, 2011

Fall Decor

Since Labor Day weekend was rainy, I took some time to put out my fall decor. It's been so hot this summer, I'm definitely wishing for cooler days and falling leaves!

With all the home improvement projects half started around here, my dusting isn't quite as regular as my mother would hope. So, I tried to minimize the amount of "stuff" I put out.


On the upside, putting out new decorative items has really made me feel more at peace with where my house is now. Last week, everywhere I looked was another project, another thing "to do". Now, I can look at my living room and think "It's getting pretty comfy in here".


On the mantle, I have pheasant feathers from my Christmas stash in a cylinder vase. 


My burlap wreath along with some books wrapped in kraft paper.


My Ballard Designs Mercury Candlesticks with a blue pumpkin from Hobby Lobby years ago


This armoire on the opposite side of the sofa got the rest of the pheasant feathers, along with my mercury glass- look pumpkins from last year.


Now my house and I are both ready for fall, whenever it decides to get here.Where has the year gone?!? 

Friday, September 9, 2011

Mom's Breakfast Room: The big reveal

My mom worked her tail off and finished her breakfast room mini makeover.  You can read all about the inspiration I gave her here.

Just to recap, until she can afford to do the intensive, let's pull the construction permits makeover she wants, this is the mini version. Scrape the ugly popcorn off, paint everything, and change up the decor items.

Here's the before:


Mom says:
 "Seven years ago I downsized to a smaller house which was in need of updating. Dirty walls, leftover
drapes, and out of date décor needed lots of help. To make the space somewhat habitable, paint was
the first order of business. The breakfast room got leftover paint on the walls, a clearance quilt for a
tablecloth and the former homeowner’s living room drapes. A month or so ago, I started some general
cleaning and threw the drapes in the washer. What came out was a faded mess that I just couldn’t put
back up and no matter what I did the walls didn’t come clean. Time for a new plan! Susie Homemaker to the rescue.

First I tackled the awful popcorn ceiling. It’s a messy job but I had done other ceilings in the house so no
problem. Well, this ceiling was a DIY from previous homeowner and did I make a mess. Handyman BJ to
the rescue (making the project a bit over budget but oh well. . .). That accomplished, I finished painting
the walls and trim. The paint was the same Sherman Williams Sprout as the kitchen but looks different
in the light filled room.

Following the e-design, went shopping and found the curtains at my local store. Not so lucky with the
rug but did manage to find one I liked in the green/blue colors of the room. I like the dark brown in it
because it ties to the walnut hardwood floors in the rest of the house. I have a more traditional taste
so I’m the interior designer’s bane of existence and just couldn’t branch out to the more modern lamp.

Did find one I liked in the right colors and on sale! The curtains went up when I got home but oh no, too
short. So, to the fabric store to add a border like the designer did for her guest bedroom. Works like a
charm. However, the tablecloth didn’t turn out so well and it will be a re-do at some point.


Overall, it is a clean and fresh breakfast room and I love it. Thanks for the e-design!"

The ceiling, which was a lesson in what NOT to do in drywall, got a rescue from the resident Handyman. Neither Mom nor I have the patience for drywall mud. The walls got two coats of Sprout, the same color as the kitchen, and straight out of the can semigloss white for the trim.

With her e-design concept board, Mom got a budget estimate with retailers, item numbers, and costs for everything on her design board. That made it easy for her to go shopping to find the items she needed. Some things she didn't agree with me on, but she did have a list of places to start her search.

I can't wait to go see how it all turned out in person!


If you're interested in an E-design, click on the "Interiors" tab for more information!

Monday, September 5, 2011

How I made my upholstered headboard


I LOVE the look of a big tall upholstered headboard. It's a really easy and inexpensive way to add drama to a room.

I knew I wanted an upholstered headboard when I started my bedroom makeover. I also wanted it to be inexpensive and easy for me to DIY.

I started with a 4'x 8' sheet of pegboard I had cut down to 4'x4' at Lowe's. While there I picked up two French-Cleat Art mounting brackets.  Then I went to Jo-Ann and bought 1" foam and quilt batting.

To start, I laid my pegboard down, and sprayed spray adhesive all over it.
Then I laid the foam down.

Moving inside, I laid my face fabric (a flat sheet from Target) down on a clean surface.


Then I laid my batting on top of that.

Finally, I laid my foamed- up pegboard down on the batting, foam side down.

First, I stapled the batting to the pegboard with my trusty staple gun. You want to pull it taut, but not tight. Try to keep even pressure all the way around so it doesn't wave.

Then, repeat the process with your face fabric. Staple one staple in the top, then one in the bottom, one in the left, and one in the right. Go back to the top and staple like hell.


When you get to the corners, you'll need to pretend you're wrapping a package or making a bed.

Pull one side down, and add a staple.

Then pull the other across and staple again.

The finished product:


Now time to add the mounting hardware.

I taped my cleats in place first:


Then screwed them in with the provided hardware.


Next I measured where the cleats were in relation to the top of the headboard and each other:


You need to do some math to figure out where to mount your cleats on the board and on the wall.


Then mount the cleats on the wall according to your math.

The cleats have an angle to them to allow the part mounted to the headboard to slip on to the wall part.

Now just get someone to help you hang the headboard on the wall cleats, and you're done.


I finished this in February (bad blogger!) and am STILL debating about adding nailhead trim to it. Any thoughts? 

Fall Wood Round Wreath

Last week, I got my new copy of Lowe's Creative Ideas magazine in the mail. If you don't already subscribe, I highly recommend it. It's free, and always a great source of inspiration. One of the things they featured was this wreath made from a cut up dowel.
Lowe's Creative Ideas


 They projected the cost at $32. Sounds great, but why would I go buy a dowel, when the backyard is full of sticks for free? So I set out to make my free version of the wood rounds wreath.

First up, Alex helped me find the perfect sticks. I was looking for one or two that were at least a couple feet long and 1 1/2 -2" in diameter, to match the style of the wreath in the magazine. I found some long branches that had a good width and tapered to about a half inch in diameter at the end.
Next, I told asked Prince Charming to cut them into random lengths with his saw. In keeping with the inspiration, I was looking for cuts between three-quarters and two inches. I didn't have him measure, because nature isn't regular. All things in nature are random, so having him make random cuts would give me a more realistic wreath. You can, however, make all your cuts the same at four different lengths if you want to follow the plan exactly.
So then I was left with a bunch of wood rounds.
I plugged in my big glue gun and got to work. I recommend not using the baby glue gun here because you want a lot of glue,and the small one just can't keep up. Got to use the right tools for the job. While the glue was heating up, I laid down waxed paper so my wreath wouldn't stick to my cardboard glue mat. Then, I took a dinner plate and a marker and traced a circle on my paper. This was my circle template.

Now time to glue! I glued two pieces together to make blocks. I then glued these blocks together, using gobs of glue, until I had filled in my circle. I then took my remaining rounds and arranged them around the outside to create a second circle. Then I glued them in place.

When arranging your pieces, make sure to vary the sizes so you get variety in both height and diameter. Once everything was glued, I let it sit for about 20 minutes to harden fully. Then, I peeled it off the waxed paper and hung it on my front door.

 love how rustic and fallish it looks. I may add a bow or some other embellishment to it, but for now, I'm keeping it plain.

It ties in perfectly with my fall mums and my pumpkins for fall. Which I would love to step back and take a picture of for you, but it decided to rain buckets today.

 It seems only fitting I share this over at The Nester's, since she's having a wreath link party. It is appropriately titled: You Made a Wreath out of What? So if you're visiting from there, hi. And if you haven't gone yet, go check out some fabulous wreaths!


Share Your Creations
 
Catch a Glimpse Button

LinkWithin

Related Posts with Thumbnails