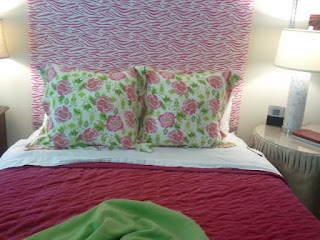
I LOVE European shams on beds. They add such a nice finished look without being 10,000 things to take off when you want to go to sleep. (Which is a plus if you have a Mr. in the house. They don't seem to understand decorative very well.) Also, Euro shams are a great size for propping up in bed to read. So they were a definite must-do for my bedroom makeover.
First, I washed and dried my fabric. If you don't wash before sewing, your piece just became dry clean only.
While I was waiting on the fabric, I did my math.
European pillows are 26" x 26" square. To make sure the pillows were nice and puffy, I wanted them to squish inside my shams. Therefore, my space for my pillow is 24 x 24. I wanted a 3" flange around the outside.
Therefore, my finished dimensions of my sham would be 3" flange + 24" insert size + 3" flange = 30". I added 1/2" on each side for a seam allowance, giving me 31" x 31" for my front piece.
Now, I needed to figure out the back. I wanted an envelope closure that overlapped in the back. I decided on a 2" overlap.
So 3" flange + 12" (half of the insert) + 2" for front hem + 1/2" seam allowance = 17 1/2" wide x the same 31" high.
Then my last piece needed to be 19 1/2" wide to give me a 2" overlap.
Next, I ironed my fabric to get it nice and flat.
Now, to cut my pieces. I have a bit of trouble with straight lines, so I opted to let the fabric do it for me.
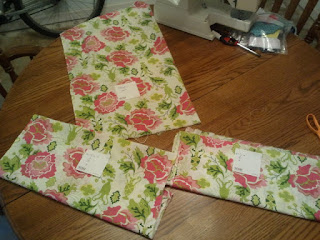
I laid it out flat on my table, measured 31", and cut a small notch.
Rip across to get a 31" tall piece. Measure across the width 31", cut, and rip again to get 31" wide.
This is your front. Label and set aside.
Repeat the measuring and ripping to get your three pieces.
For both back pieces, fold one edge over 1", and iron.
Fold over again, and iron again to make a double hem.
Sew along the front with a 3/4" seam allowance to secure the hem. It will look like this from the back:
Repeat with the second back piece.
Now it's time to assemble the pillow. Lay the front piece on your table, face up.
Lay the 17 1/2" wide piece face down on top of the front, lining up the edges.
Lay the remaining piece face down on top of the other two, again lining up the edges.
Sew along the edge, using a 1/2" seam allowance.
Turn your sham inside out and press.
Top-stitch all the way around, 3" from the edge to create the flange.
Stuff your pillows in and enjoy!
I love the pop of floral and green they add to the room!
This method can easily be adapted for any size pillow, just change the sizes based on your insert.


