Showing posts with label renovation. Show all posts

Wednesday, August 3, 2011

Progress on the Stairs

If you remember, back in Feburary I  pulled up all the carpet on the stairs in my house. I'm finally getting around to finishing that project, starting with painting all the railings.

Before, they were stained and painted, and drove me nuts! I'm big on things matching, and this stain didn't go with ANY of the other wood tones in the house- furniture or hardwood floors!

I washed everything down to begin, then used my sanding sealer to rough the surface and prepare it for paint. 

After it dried, two coats of Zinnzer primer


Then two coats of  Semi gloss white paint (the color straight from the can)


A HUGE improvement!

Now, on to the rest of the stairs and the stairwell walls!

Sunday, June 5, 2011

Kristen's bathroom- REVEALED!

I know you have all been anxiously awaiting the reveal of Kristen's bathroom. Since we did the reno while she was on vacation, I had to wait until she was home before I could reveal it!

I'm about to burst I'm so excited to share this with you!

Here's the before:

Talk about SMALL! If you remember when I first blogged about it here, this is the only bathroom, so it needs to be high on function AND style.

I shared a peek at the design board and the storage wall here.

And now, here's the finished product!


I need to extend a huge thank you to my awesome Mom, who came down and supervised the installation while I was at work. Another huge thank you to Kristen and Kris, for the opportunity and for letting me feature them here.

Soon, I will have the e-design for the winner of my Giveaway to feature!

Remember, if you are interested in your own E-design, you can contact me at MissSusieHomemaker@gmail.com! Click on the "Interiors" tab at the top for more info!

Linking up to:

Craft Couture


Catch a Glimpse Button

Wednesday, May 11, 2011

Spray Painted Lamps

As part of my girly bedroom makeover, I updated some of my lamps.
First, I taped off everything electrical.
DSCN1290
Then, I used liquid sander to degloss the surface so the spray paint would stick.  If you’ve never used it before, this stuff is AWESOME!
DSCN1293
Then came two light and even coats of spray paint in a satin finish.


I love how it adds a fun punch of color to the space and updates an old lamp into something fun and exciting!
I also did a turquoise lamp to add fun color to my
entryway!


Catch a Glimpse Button

Monday, May 2, 2011

Burlap Table Skirt

For my bedroom, I made a ruffly burlap table skirt. I was inspired by the beautiful burlap skirts found in Ballard, and the ruffly skirts I saw in Charleston at GDC Home.
DSCN1376

DSCN1250

Mom and I had help from our favorite four-legged paperweight:
First we made our ruffle, ours is 5” plus seam allowances.
DSCN1276
Measure the width of your strip and make a small 1/2” or less snip to mark the spot.  Pull the thread to create a straight line, and cut on this line to get your straight strip.
DSCN1277
DSCN1282
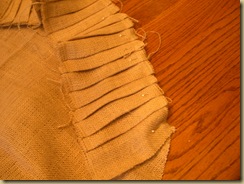
Iron pleats in your hem. You can either do them regularly spaced, or make it random for a more casual look.
DSCN1279
Then sew the pleats down using a zig-zag stitch.
DSCN1284
DSCN1254
DSCN1255
When you’re finished, you will have a long strip that looks like this. In order to ensure you have enough to go around,  you will have to do some math.  You need enough to go around the circumference of your circle (that’s 2piR for your geometry refresher) * 2-3 depending on your pleats.
DSCN1256 DSCN1257
Next, sew widths of the burlap together so that it is at least as wide  as your total tablecloth (drop + top round+ drop) (ignore the ruffle height, so you’ll have some flub room).

DSCN1260
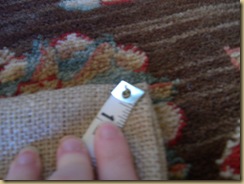
Fold your big ol’ piece of burlap into quarters.
DSCN1261
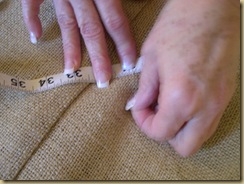
At the folded corner, pin your tape measure.
DSCN1263
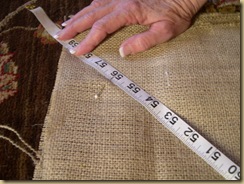
Make your first mark at what I’m going to call point A. Point A will equal the radius of your circle + seam allowance+ seam allowance.
DSCN1265
After you’ve made marks across at Point A, now on to Point B. Point B is the drop of your skirt – the ruffle + seam allowance + hem.
DSCN1269
When you’re done, you will have a piece of burlap with a bunch of pins.
DSCN1270
Now play connect the dots. Gee, isn’t this fun?
  DSCN1275     
Take your top Round (which you cut out along Points A). and pin the ruffle to it.
DSCN1285
Sew using a zig-zag stitch for stability.
DSCN1273
You’ll have a blob like this when you’re finished.
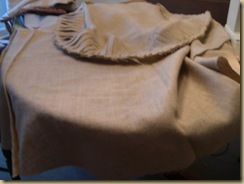
DSCN1287
Next, take the piece  you cut along Points B, and pin it to the other side of your ruffle. Sew this using a zig-zag stitch.
Now, all you have to do is hem, and put it on display!

DSCN1375
Here’s the finished product. I have to give major kudos to Mom and her awesome sewing skills, because my brain just couldn’t figure this out!

Linking up to:
Craft Couture

My Repurposed Life

Wednesday, February 23, 2011

Scraping the crud off the ceilings


Our first project in the bedroom makeover was to take all the lovely 1980’s popcorn off the ceiling. As a designer, popcorn is one of my pet peeves. I hate it.

Luckily, Mom has a lot of experience getting this stuff off the ceiling.

DSCN1190

You  need:

DSCN1195 A Spray bottle filled with really hot water

and a scraper of some sort. I prefer the 8” taping knife.


The texture is going to get everywhere, so protect the furniture and floor with drop cloths.

Spray a portion liberally with hot water, then scrape the texture off.

DSCN1197 (2)

I found long smooth strokes work best, with the knife at an angle. If you have a stubborn spot, spray with more hot water, and let it sit for a minute before scraping at it again.

It’s not easy work, but it is easier than putting up new drywall.   A lot of times the texture is never painted, so it comes right off.

DSCN1199

Once all the texture is off, you will need to fill any cracks or imperfections with a coat of drywall joint compound, let dry, then sand smooth.

I had a few places the texture had been patched I couldn’t get out, so I just put compound over them to feather it out.

Once sanded and pretty, you’re ready to paint!

Thursday, November 25, 2010

Julia's Living Room REVEAL

If you remember, I was helping re-do Julia's 10 year old living room. I blogged about it here.


It's finally finished, just in time for the holidays! A reminder to everyone, start your renovations mid summer or early fall to have things finished in plenty of time for the holidays. The last thing you want is to be scrambling to put your house back together with all the other things going on!

In additon to having pieces re-upholstered, we painted and enhanced the crown moulding by adding a picture rail.


This room already had a small crown when she bought the house several years ago. As she renovated the other rooms, Julia added a taller crown.

To make the living room stand out, we added  picture moulding 2" below the existing moulding, then  painted everything out white to tie it together.


We also changed out the lamps, and added a small desk for her laptop.


Here's the finished product again:


LinkWithin

Related Posts with Thumbnails